Études d'ensoleillement, diagrammes d'ombres (avec POV-Ray)
The following are very rough hints on how to proceed to obtain images useful to draw a shadow-casting diagram.Project-preparation
When preparing your project, make sure you consider the following (this list is not intended to be a complete check-list).
- Ensure your model is correctly georeferenced.
- All buildings within a certain radius should be included. Significantly influent buildings need to be modelled with higher precision (think of roofs, balcons, etc).
- In general, topography must be modelled in sufficient detail (e.g., think of the influence of a mountain).
- Trees (esp. forests) might need to be included.
Camera definition (start in 3D-mode):
- You can use the following to get a view from above with nearly no perspective effects (a nearly parallel projection):
- Specify the camera coordinates:
- camera_position: h=~2000–5000m
- camera_lookAt: h=0, x:= camera_position.x + 1
- use
 (zoom +) to get the wanted image size (press a few times; be sure you use the zoom button and not the one to get closer (nor the mouse-wheel)
- Specify the camera coordinates:
- To be able to reproduce the sun-study, keep the camera as a camera-element in the project (see tool in 3D-mode).
POV-Ray settings:
- Model-content options:
- Show terrain: ground-surface color: white (for good contrast)
- Light:
- sun-lighting level: ~10
- indirect and camera lighting levels: 0
- Image:
- For efficiency, start using a low quality image ("draft" or less).
- For the final version of your images, you might want to increase quality (do so only once you're happy with all other settings)
- Select "generate sun-study series" and specify
- wanted days of the year (and time interval for each wanted day),
- time-interval between instant-images,
- other options (in particular, the option to create an enhanced day-average image is very handy; see notes below)
Notes
- There is an option (Create an encanced 'day-average' image in Realistische 3D-Darstellung (POV-Ray) > generate a sun-study series) that helps you to find the long-time-shadowed areas, by producing an additional day-average image in which areas that are shadowed above a certain number of instant-images are darkened.
To determine if a certain area is in shadows, the program compares each "normal" instant-image with a shadowless version of it, pixel by pixel: if a pixel in the normal instant-image is darker than in the shadowless image, it's considered to be in shadows.
Note (details): In the way the term "shadow" is used here, "not being directly illuminated by the sun" in an instant-image does not imply "being in shadows". For simplicity, let's consider a face of a very small and (infinitely) thin, planar wall (e.g., think of one that corresponds to a single pixel in an instant image). When it's not directly illuminated by the sun at a certain instant (dark in the corresponding instant-image), this can be
- because there is anther surface blocking the rays coming from the sun (this other surface casts shadows on our wall-face), or
- just because of its orientation (e.g., the sun is currently illuminating the other face of our wall).
- Concerning the time interval between instant-images, 30 min is often sufficient for simple cases. For complex cases (e.g. building(s) with distinct high "peaks"), you might often need to use a shorter interval.
- You might sometimes want to use a raster element with plan information (see related options under 3d-model-content > Show DTM).
- The use of textures (e.g. using grass instead of a plain color) increases the rendering time.
Example
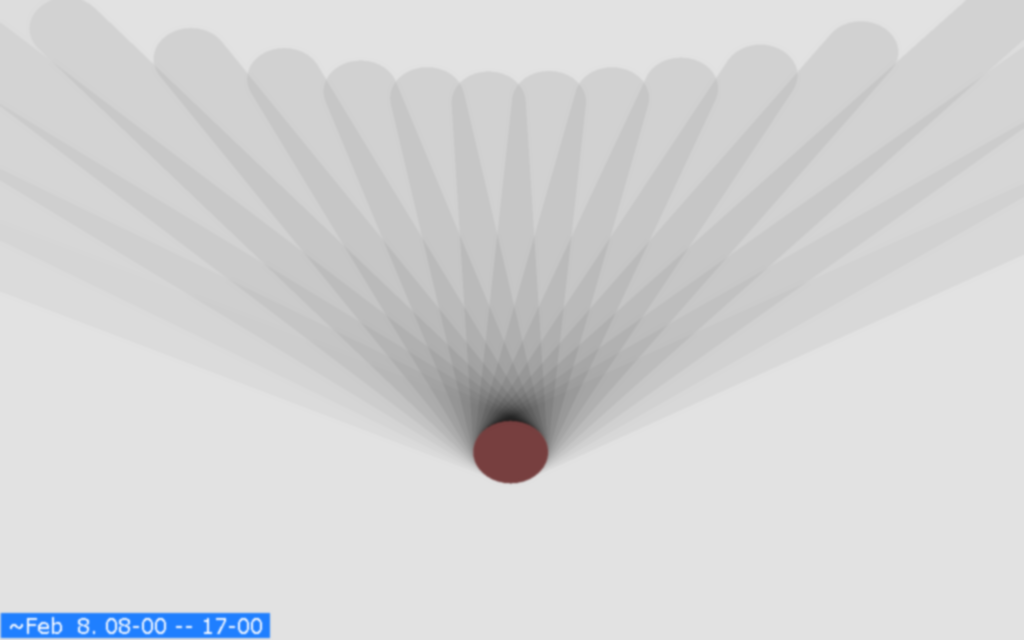
The following are day-average images for a 30m-heigh cylindrical building (time-interval for instant-images: 30 min):
- day-average image:
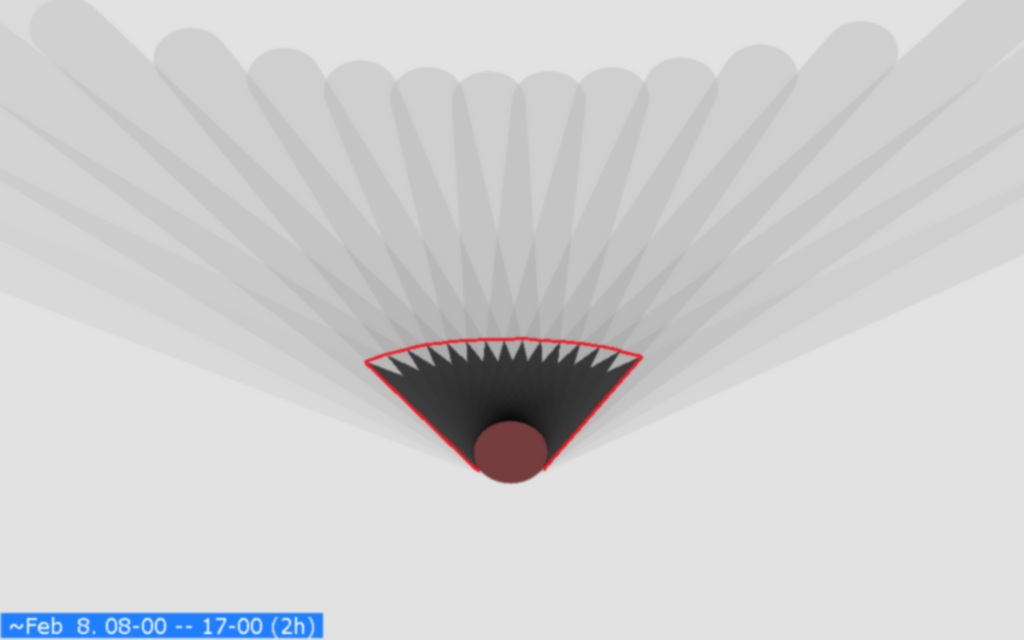
- enhanced day-average image (base for a 2h-shadow diagram); see comments above:

- 2h-diagram (the red 2h-line was added "manually"):